

Working well with a renovation contractor does not mean visiting the site every day or approving every technical detail yourself. It means agreeing on how decisions, progress, money and problems will be recorded before the project becomes busy.
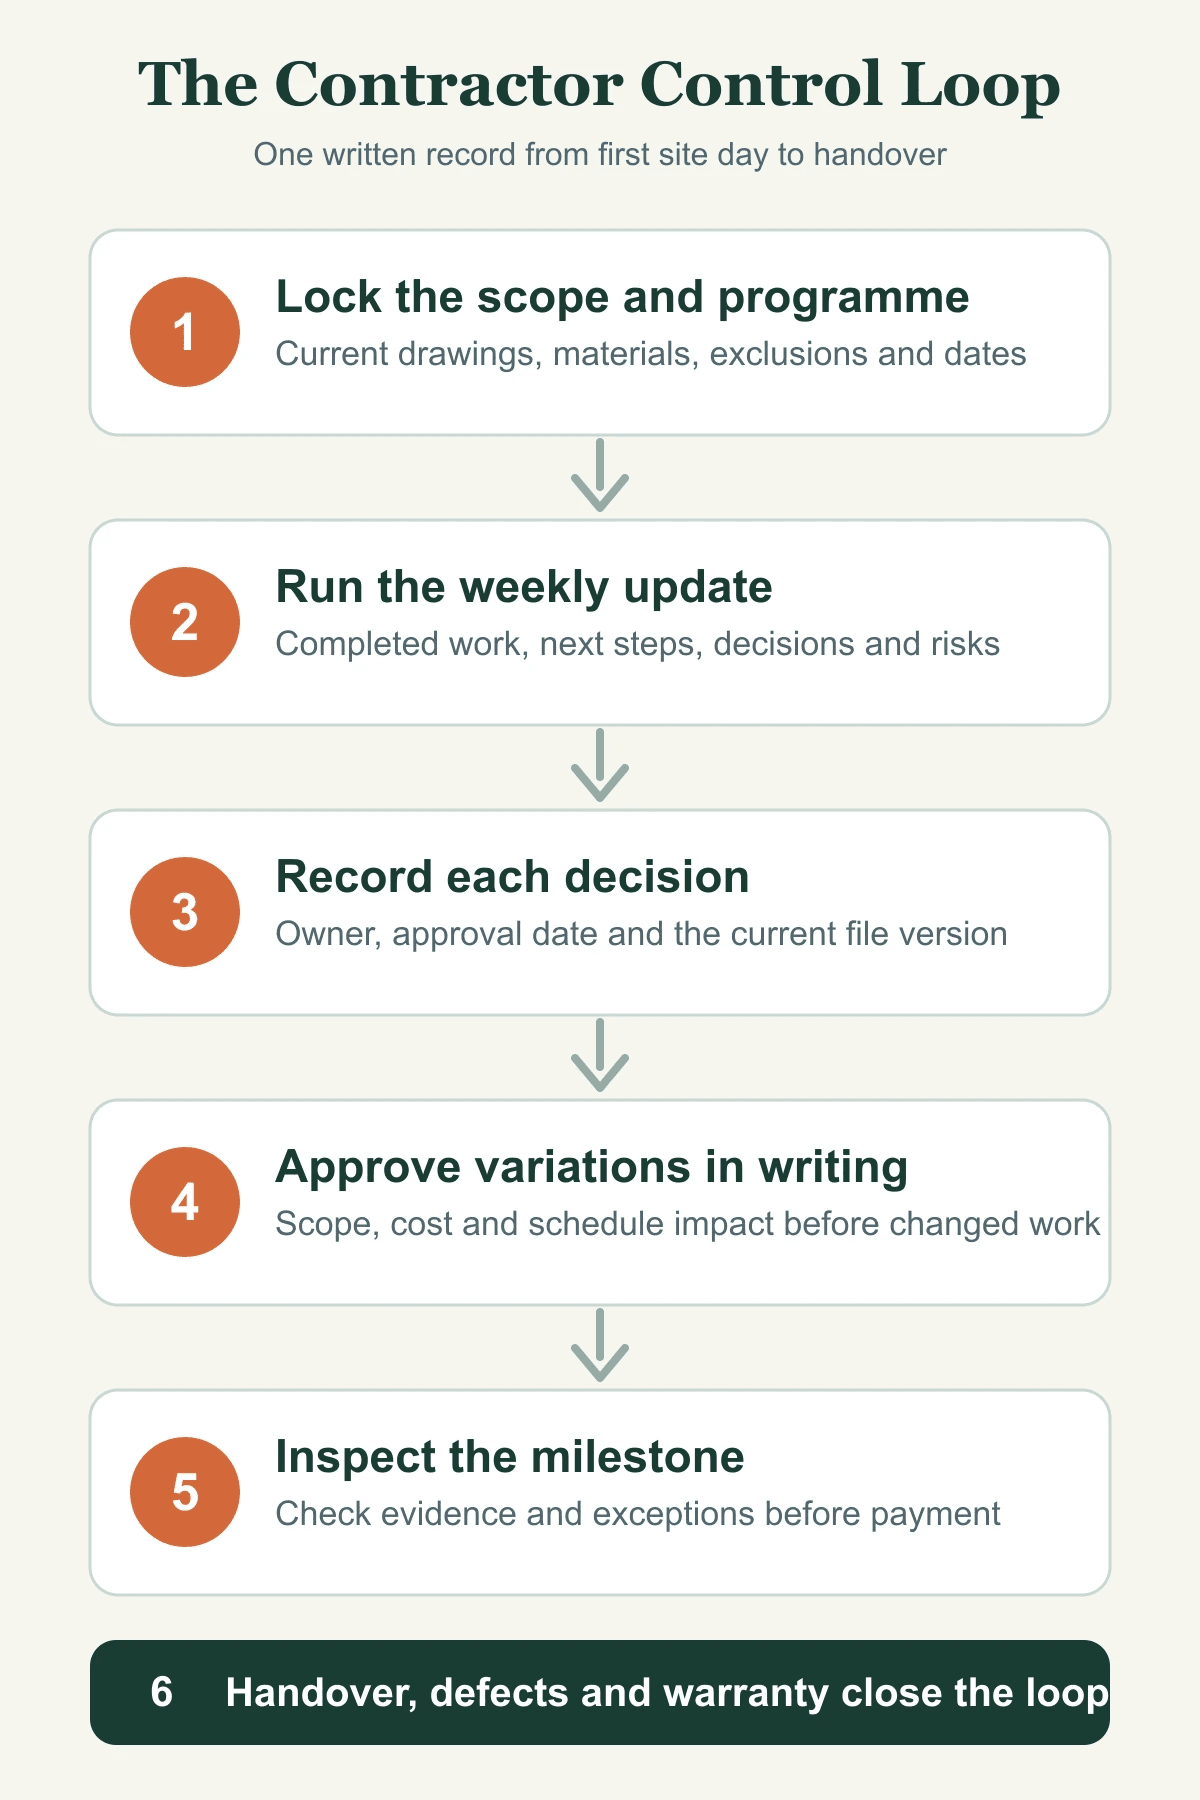
The practical system is simple: keep one written programme, one decision log and one payment trail. Hold a short weekly update, approve every variation before changed work begins, inspect the agreed milestone before releasing payment, and close the project with a documented defect list and handover.
This guide starts after you have compared quotations and selected a contractor. If you are still deciding who to appoint, use our renovation quote comparison guide and renovation scam protection checklist first.
Quick Answer: How Should You Work With a Renovation Contractor?
Set these six controls before site work starts:
- Confirm the signed scope, drawings, material schedule and exclusions.
- Agree on one programme with decision deadlines and inspection milestones.
- Use one written channel for approvals, variations and important instructions.
- Hold a short weekly progress review with photos and next steps.
- Inspect the relevant milestone before making the matching payment.
- Finish with a defect list, rectification record, warranties and final handover documents.
The contractor manages the trades and work sequence. The homeowner makes timely decisions, provides access, reviews evidence and approves changes. Problems grow when either side assumes that a verbal conversation is the project record.
Agree on the Working Rules Before Work Starts
CCCS guidance for the renovation industry says contractors should agree on a work schedule with projected start and completion dates, quote transparently, describe the goods and services accurately, state remedies clearly, and obtain the consumer’s consent before changing the agreed work. These principles are also a useful operating system for the project itself.
Before the first trade arrives, agree on:
| Project control | What to record |
|---|---|
| Main contact | Who gives instructions for the homeowner and who answers for the contractor |
| Communication channel | Where binding decisions, approvals and notices will be recorded |
| Programme | Start date, target completion, work phases, inspections and owner decision deadlines |
| Site access | Keys, working hours, lift or loading rules, protection and neighbour considerations |
| Drawings and materials | The latest approved plan, dimensions, colours, models and finishes |
| Variations | The written approval process for scope, price and time changes |
| Payments | The milestone evidence required before each amount becomes due |
| Defects and warranty | How defects are logged, rectified, closed and reported after handover |
Read the current CCCS fair trading guidance for the renovation industry alongside your contract. It is written for contractors, but it gives homeowners a clear picture of fair project behaviour.
Keep One Source of Truth
A renovation can generate several quotations, drawing revisions, chat groups and product screenshots. If nobody can tell which version is current, the project is already exposed to rework.
Create one project folder and keep these items together:
- Signed contract and final itemised quotation
- Approved floor plans, elevations and electrical points
- Material and finish schedule with model numbers where relevant
- Current programme and milestone dates
- Decision log showing what was approved, by whom and when
- Variation orders showing scope, price and schedule impact
- Site photos organised by date and room
- Invoices, payment evidence and official receipts
- Permit, MCST or licensed-trade documents where applicable
- Defect list, warranties and handover records
Name each revision clearly. A file called kitchen-elevation-approved-2026-10-12.pdf is much safer than final-v3-new.pdf. After a site discussion, send a short written recap and ask the contractor to correct anything that is wrong.
Use a Weekly Renovation Check-In
A productive weekly update can take 15 to 20 minutes when the information is prepared. It should answer five questions:
- What was completed this week?
- What is planned next week?
- Which homeowner decisions are due, and by when?
- What may affect cost, quality or completion?
- Which milestone is ready for inspection or payment?
Ask for photos that show the actual work, not only close-up beauty shots. For concealed electrical, plumbing or waterproofing work, agree on the evidence and inspection point before the work is covered.
Do not use the weekly meeting to redesign the project casually. Record new ideas as proposed variations, then decide after seeing their cost and schedule effect.
Approve Variations Before Changed Work Begins
CCCS says revisions to the contract or work order should only be made with the consumer’s express agreement. CaseTrust also states that accredited renovation businesses must communicate additional costs and agree variations in writing before the work.
Every variation should show:
- The original item being changed
- The new scope, quantity, material or drawing
- Items removed as well as items added
- Additional cost or credit
- Effect on completion or another trade
- Who approved it and the approval date
If the cost or time impact is not ready, the variation is not ready for approval. A verbal “go ahead first” can turn a small design choice into a large argument after fabrication or installation.
Inspect the Milestone Before Releasing Payment
Payments should follow the signed schedule, but a milestone label still needs evidence. If a payment is tied to completion of tiling, carpentry installation or electrical second fix, confirm that the described stage is substantially complete and note any exceptions.
Use this sequence:
- Contractor says the milestone is ready.
- Homeowner reviews the relevant work and evidence.
- Both sides record incomplete or defective items.
- Contractor confirms how those items will be handled.
- Homeowner makes the payment required by the contract and keeps the receipt.
CaseTrust-accredited renovation businesses use a standard renovation contract with progressive payments. CASE states that their initial deposits are capped at 20 percent, and that the scheme includes a deposit performance bond and a 12-month workmanship warranty, subject to the contract terms. Check the current CaseTrust renovation protections rather than assuming every contractor offers the same safeguards.
Know What HDB Listing Does and Does Not Mean
For an HDB flat, HDB states that homeowners must engage a contractor listed in the Directory of Renovation Contractors, including for renovation works that do not require HDB approval. The contractor should also identify work that needs a permit and obtain the required approval before affected work starts.
Being listed in the directory means the contractor is aware of HDB renovation requirements. HDB also makes clear that it does not endorse or guarantee the quality of the contractor’s work, and that the homeowner-contractor relationship remains a private contract.
Check the current HDB important renovation information and HDB guidance on finding renovation contractors against your actual flat and scope.
Handle Delays and Disagreements Early
Ask for an updated programme as soon as a missed dependency affects another task. A useful delay notice should state:
- What happened
- Which activity is affected
- What can continue
- The proposed recovery action
- The revised milestone or completion date
- Any homeowner decision needed
Keep the discussion about the contract, evidence and next action. Avoid broad instructions such as “finish everything faster” because they do not identify the blocked activity or a workable recovery plan.
For a quality concern, photograph the area, mark the location, describe the expected result and agree on the rectification check. If the contractor stops responding or the project becomes a formal dispute, preserve the full evidence file and use our guide to renovation dispute and money recovery options in Singapore.
Do Not Micromanage the Trades
The homeowner should manage outcomes, decisions and evidence. The contractor should manage trade coordination, methods and safe sequencing.
| Homeowner should manage | Contractor should manage |
|---|---|
| Budget ceiling and approved scope | Trade scheduling and site coordination |
| Timely design and material decisions | Work methods and installation sequence |
| Access, estate requirements and owner-supplied items | Worker supervision and site housekeeping |
| Written approval of variations | Permit submissions assigned to the contractor |
| Milestone inspection and payment records | Quality checks before presenting a milestone |
| Defect priorities and handover acceptance | Rectification and warranty response |
If you direct an individual worker to change something without the contractor’s knowledge, you may create a scope, safety or payment problem. Route instructions through the agreed project contact.
Close the Project With a Structured Handover
Handover is a process, not one key collection meeting.
1. Pre-handover inspection
Walk through room by room before the final acceptance date. Test doors, drawers, locks, lights, switches, sockets, plumbing fixtures and installed appliances where relevant. Check visible finishes in normal daylight and record defects with a photo, location and description.
2. Rectification and close-out
Agree on responsibility and a target date for each item. Keep completed items and disputed items separate so the list can close progressively.
3. Final documents
Collect the final approved drawings, variation summary, payment statement, receipts, warranties, manuals, paint or material references, keys and contractor contacts. Record the completion date because warranty periods may run from it.
Renovation Contractor Working Checklist
Use this short list throughout the project:
- One authorised contact on each side
- One current scope and drawing set
- One programme with decision deadlines
- One written decision and variation log
- Weekly progress evidence and risk review
- No changed work without written approval
- No milestone payment without the agreed evidence
- HDB, MCST and licensed-trade requirements tracked
- Defects logged by room, photo and status
- Handover documents and warranty route collected
If you want the project controls built into the quotation from the start, review our renovation packages or request an itemised renovation quote.
Frequently Asked Questions
How often should I speak with my renovation contractor?
Use one scheduled weekly progress review and contact the contractor between meetings when a decision, safety issue or blocked activity cannot wait. A predictable rhythm is clearer than scattered daily messages.
Do I need to visit the renovation site every day?
No. Agree on inspections at meaningful milestones and request dated progress evidence. More visits do not help if decisions, variations and defects are not recorded.
What renovation records should I keep?
Keep the signed contract, quotation, approved drawings, material schedule, programme, decision log, variations, photos, permits, invoices, receipts, defect list, warranties and handover documents.
Can a contractor change the price after work starts?
A genuine change may affect price when you approve a different scope, material or quantity, or when a stated site assumption proves wrong. The change should be explained and agreed in writing before changed work begins.
What should I do when the renovation is delayed?
Ask for the affected activity, cause, recovery action and revised date in writing. Record your decision on any proposed change. Escalate using the contract and evidence if the contractor does not provide a workable plan.
Who applies for an HDB renovation permit?
The HDB-listed renovation contractor normally submits the application for work that requires HDB approval. Confirm the responsibility, affected work and approval status before scheduling that work.
How should I report renovation defects?
Create one list with the room, exact location, photo, expected result, date reported, responsible party and status. Reinspect completed rectification and close each item in writing.
What should I collect at renovation handover?
Collect final drawings, variation and payment summaries, receipts, warranties, manuals, material references, keys, outstanding defect dates and the contact method for warranty claims.