
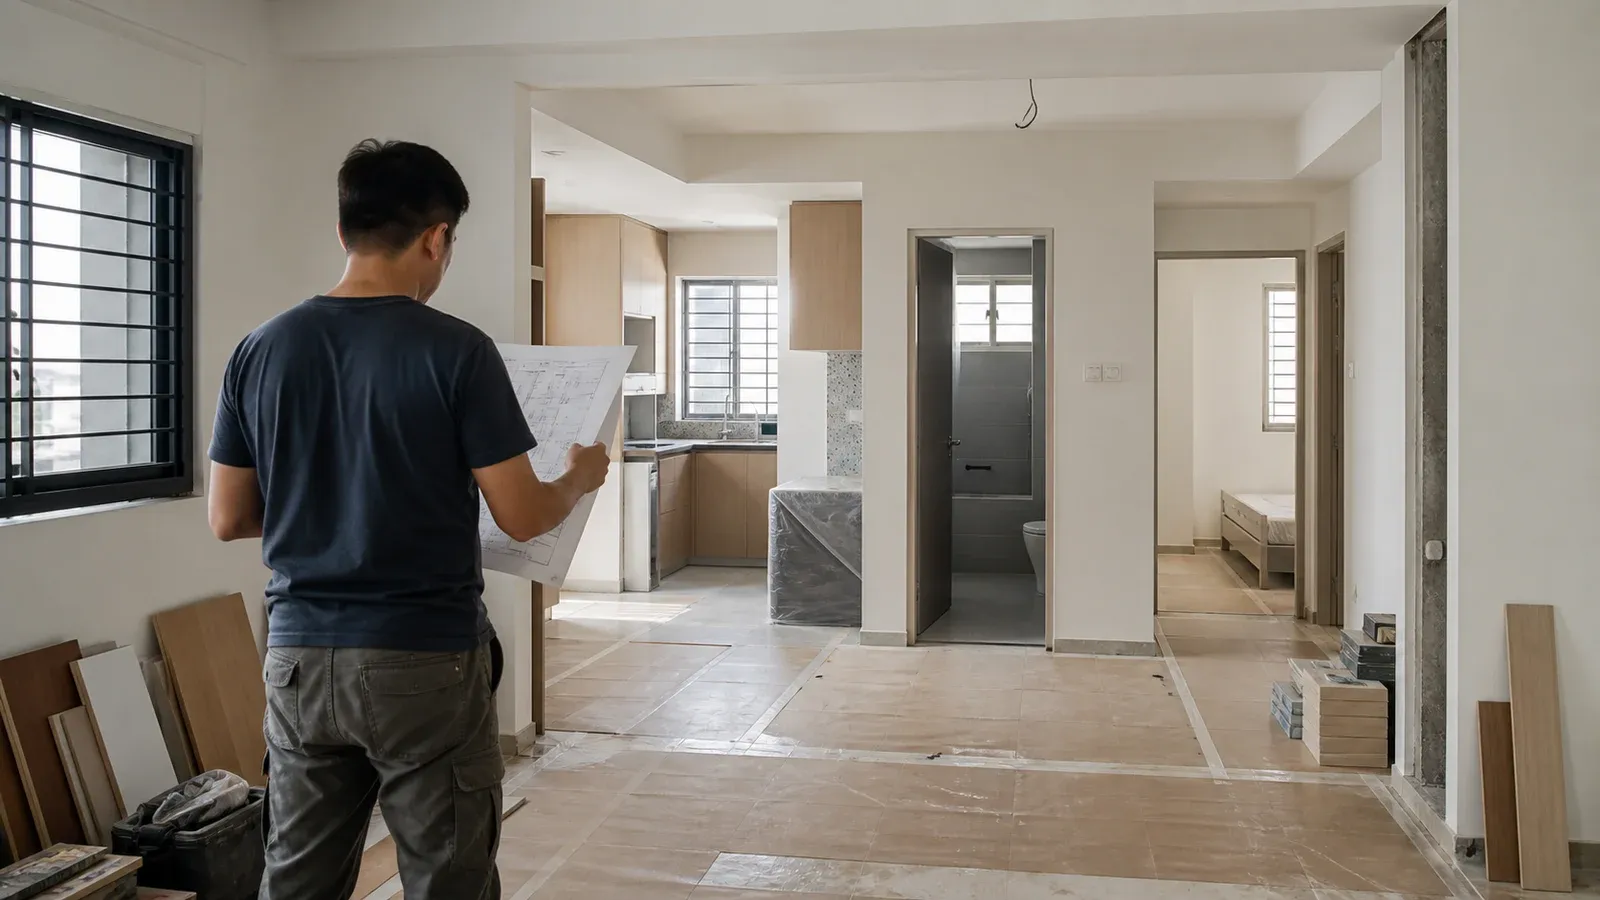
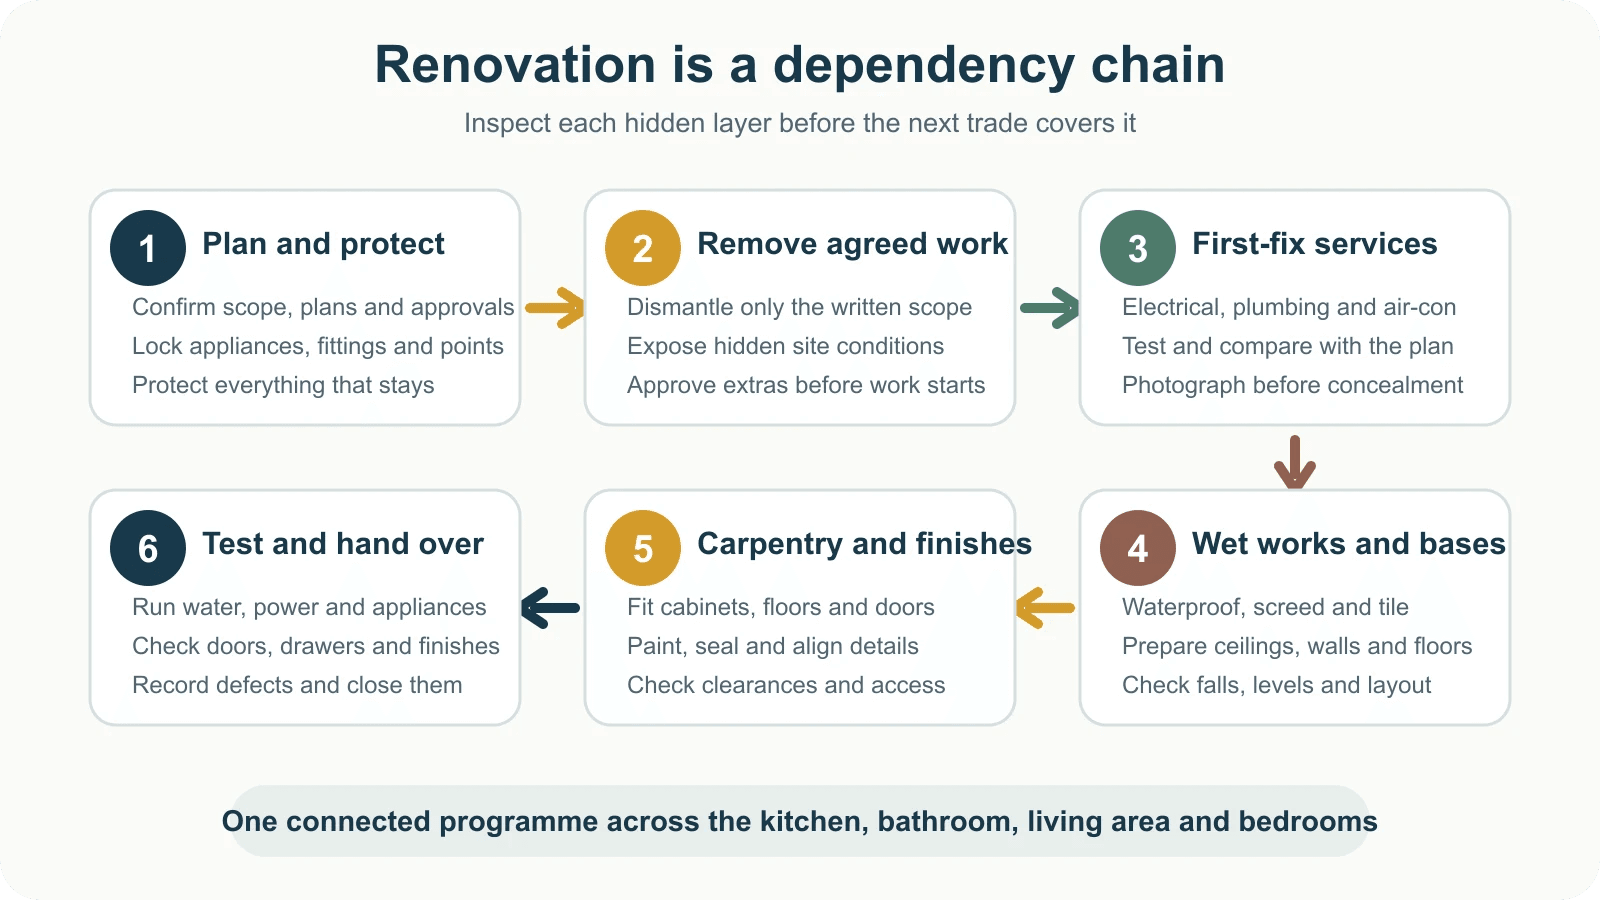
A home renovation in Singapore does not happen as four separate room projects. The kitchen, bathrooms, living area and bedrooms share electrical routes, plumbing, flooring levels, ceilings, air-conditioning, carpentry measurements and finishing trades.
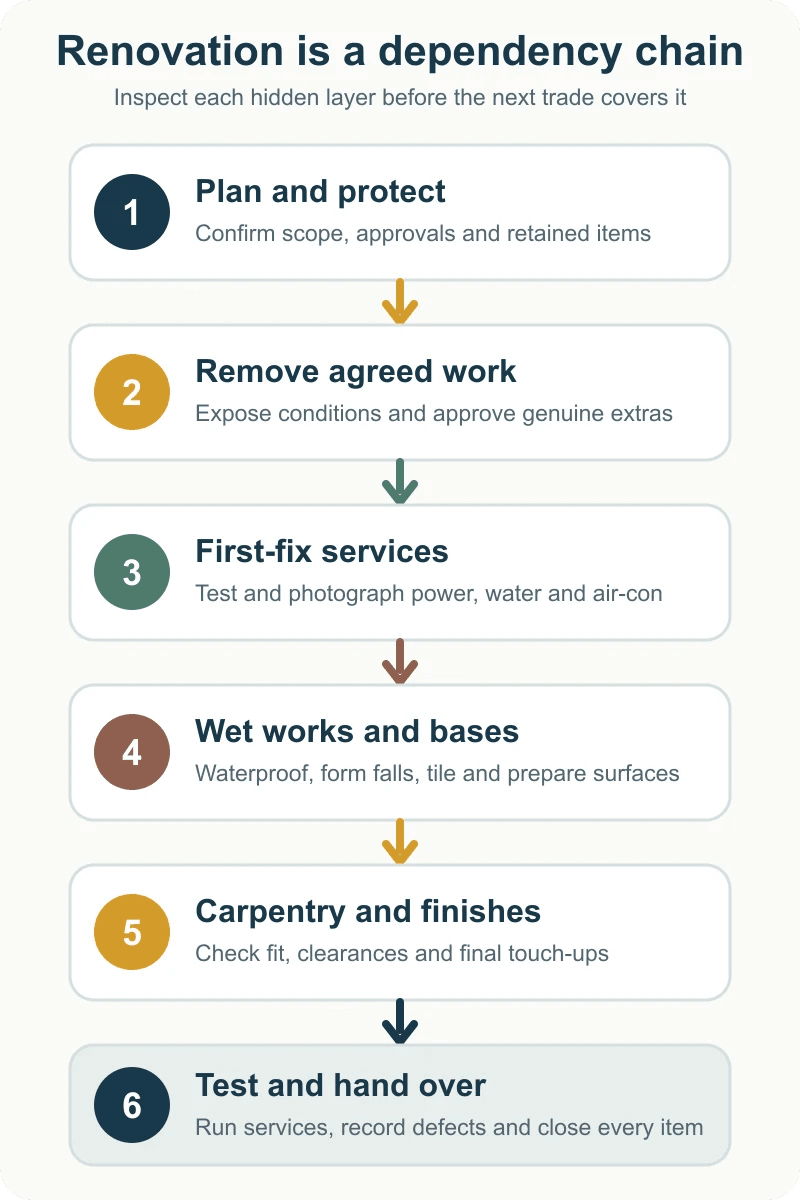
The practical order is usually: confirm the scope and approvals, protect the site, remove agreed work, install concealed services, complete wet works, install floors and carpentry, apply finishes, connect fittings, test everything, then hand over.
The exact programme changes with the property condition and scope. Use this room-by-room guide to understand what should happen, which decisions must be made early, and when to inspect before the next layer hides the work.
Quick Answer: What Happens in Each Room and in What Order?
| Project stage | Kitchen and bathrooms | Living areas and bedrooms | Homeowner checkpoint |
|---|---|---|---|
| Plan and approve | Confirm appliances, sanitary fittings, layouts and service points | Confirm lighting, air-conditioning, storage, flooring and furniture dimensions | Approve the itemised scope, drawings, materials and required submissions |
| Protect and remove | Dismantle agreed cabinets, fittings, tiles and pipes | Protect retained finishes and remove agreed flooring, ceilings or built-ins | Record hidden conditions and approve any genuine variation before extra work |
| First-fix services | Run concealed plumbing, drainage, electrical and ventilation routes | Run wiring, lighting, data and air-conditioning routes | Photograph and test concealed work before it is closed |
| Wet works and base finishes | Complete waterproofing, screed, falls and tiling | Complete levelling, flooring bases and ceiling preparation | Check levels, falls, tile layout and visible defects before progressing |
| Carpentry and finishing | Install cabinets, worktops, vanities and storage | Install wardrobes, consoles, doors, floors, paint and feature work | Check alignment, clearances, colours, edges and appliance spaces |
| Final connections and handover | Connect appliances, sanitary fittings, lights and accessories | Fit switches, lights, hardware and final touch-ups | Test drainage, sockets, doors, fittings and every agreed item |
Before Any Room Starts: Confirm the Shared Plan
Start with the whole home, not the room finishes. The contractor needs a coordinated plan for what stays, what goes, which services move and where every fixed item will sit.
Confirm these items before the site starts:
- Rooms, work categories, measured quantities and material specifications
- Existing floors, walls, doors, cabinets and services that will be retained
- Hacking, disposal, protection and cleaning responsibilities
- Kitchen appliances, sanitary fittings and air-conditioning models that affect dimensions
- Electrical points, lighting controls, data points and plumbing locations
- Flooring transitions, door clearances and built-in carpentry depths
- HDB permits, MCST submissions or professional assessment where required
- Work sequence, payment milestones, variation process and handover date
For HDB flats, works that require approval should begin only after the permit is granted, and the renovation contractor must be listed in HDB’s Directory of Renovation Contractors. HDB also identifies when a Licensed Electrical Worker, trained air-conditioner installer or Qualified Person is required. Review the current HDB renovation permit guidance against the actual scope.
For a condo, obtain the current MCST renovation pack before finalising the quotation. BCA advises owners to check the developer, MCST and Sale and Purchase Agreement for restrictions. Structural slabs, beams, columns and walls cannot be altered without proper professional assessment and approval. See BCA’s current condo-owner renovation guidance.
What Happens During a Kitchen Renovation?
The kitchen connects carpentry, plumbing, drainage, electrical work, ventilation, appliances, wall finishes and floor levels. That is why the layout and appliance specifications need to be settled early.
1. Retain, Protect and Remove
Mark every item that stays. Protect adjoining floors, doors and common access routes. Remove only the cabinets, worktops, tiles, fittings and services included in the written scope.
Once the old work is exposed, inspect the wall and floor condition, pipe routes and existing electrical points. If a concealed problem changes the scope, ask for a written variation with cost and timeline impact before continuing.
2. Install Concealed Services
Plumbing, drainage, power points, lighting, appliance circuits and ventilation routes must match the final kitchen layout. Moving them after cabinets and tiles are installed creates avoidable rework.
EMA says wiring changes and additions or replacements of power points, switches and lighting points should be carried out or supervised by a Licensed Electrical Worker. PUB requires regulated water-service and sanitary plumbing work to be carried out by a Licensed Plumber.
Before these routes are covered, keep photographs and confirm that the positions match the approved plan.
3. Complete Base Works and Carpentry
Wall and floor preparation, tiling and ceiling work should be completed to the level needed for accurate cabinet installation. Carpentry may be fabricated off site, but final dimensions and site conditions still need to match.
During installation, check:
- Cabinet alignment, door swing and drawer clearance
- Worktop joints, sink and hob cut-outs
- Space, ventilation and service access for appliances
- Gaps where water, grease or pests could collect
- Hardware operation and edge finishing
4. Connect, Test and Finish
Connect the sink, tap, appliances, lights and accessories only after the surrounding work is ready. Test water flow, drainage, socket locations, appliance clearances and every cabinet door before accepting the kitchen.
For costs and scope decisions, compare the kitchen renovation package with the home renovation budget guide.
What Happens During a Bathroom Renovation?
Bathroom work is less forgiving because plumbing, drainage, waterproofing, floor falls and tile levels become difficult to repair once covered.
1. Remove the Agreed Finishes and Fittings
After protection is in place, the team removes the listed tiles, sanitary fittings, screens, vanities and affected services. The exposed area should be checked for leaks, pipe condition, damaged substrate and any difference from the assumed scope.
2. Complete Plumbing and Drainage Routes
Confirm the positions and heights of taps, mixers, basins, water heaters, floor traps, shower fittings and sanitary appliances before walls and floors are closed.
Regulated water-service and sanitary plumbing work must be handled by a PUB Licensed Plumber. This includes installation, alteration, repair or replacement of relevant water pipes, sanitary appliances and sanitary piping.
3. Waterproof, Form Falls and Tile
Waterproofing needs a continuous system around the agreed wet area, with proper attention to corners, penetrations and floor traps. The contractor should follow the specified installation and testing method before tiling.
The finished floor should direct water towards the floor trap without leaving avoidable ponding. Check tile layout, edge cuts, grout lines, wall alignment and transitions before the final fittings make access harder.
4. Fit, Seal and Test
Install sanitaryware, screens, mirrors, storage, lights and accessories after the tile work is ready. At handover, run every tap and shower, flush the toilet, check drainage, inspect sealant and look below fittings for leaks.
What Happens in the Living and Dining Areas?
Living and dining areas often look simpler, but they connect the entrance, bedrooms, kitchen and main service routes. Work should preserve safe access and coordinate ceiling, lighting, air-conditioning, flooring, doors and built-ins.
A typical sequence is:
- Protect retained doors, windows and common routes.
- Remove agreed floors, ceilings, feature work or built-ins.
- Run electrical, lighting, data and air-conditioning routes.
- Complete ceiling, wall and floor preparation.
- Install flooring, doors and fixed carpentry in the planned sequence.
- Paint, fit lights and hardware, then complete touch-ups.
Before ordering a TV console, feature wall or display cabinet, confirm ventilation, socket access, cable routes and the actual equipment dimensions. Decorative carpentry should not block electrical panels, air-conditioning access or future maintenance.
If the living area is the main path through the home, schedule protection and deliveries carefully so later trades do not damage completed floors.
What Happens in Bedrooms and Study Areas?
Bedrooms usually combine flooring, paint, wardrobes, study carpentry, lighting, power points, data and air-conditioning. These rooms are easier to phase than bathrooms or kitchens, but early service decisions still matter.
Confirm bed, desk and wardrobe positions before fixing sockets and switches. Check that wardrobe doors clear the bed and room door, drawers can open fully, and air-conditioning air flow is not blocked by tall carpentry.
The usual order is:
- First-fix electrical, data and air-conditioning routes
- Ceiling and wall preparation
- Flooring or floor finishing
- Wardrobe and study carpentry installation
- Painting, lights, switches and hardware
- Door, drawer, socket and air-conditioning checks
If you plan to renovate bedrooms later, settle shared wiring, air-conditioning routes and flooring transitions during the main project. This reduces the need to reopen finished common areas.
Whole-Home Systems That Should Not Be Planned Room by Room
Some decisions cross every room and need one coordinated drawing:
- Electrical load, distribution board, circuits and power-point locations
- Air-conditioning equipment, drainage, trunking and access for servicing
- Water supply, sanitary discharge and floor-trap connections
- Ceiling levels, curtain pockets, access panels and lighting positions
- Flooring levels and transitions between wet and dry areas
- Wi-Fi, data cabling, television and smart-home control points
- Door swings, built-in depths and furniture circulation space
Treating these as separate room decisions can create clashes. One late kitchen change may affect a circuit, ceiling route or floor transition that runs through the living area.
Five Inspection Gates Before Handover
You do not need to visit the site every day. Schedule inspections when a decision or hidden layer still can be corrected efficiently.
| Inspection gate | What to check | Why it matters |
|---|---|---|
| After removal | Hidden damage, retained items, actual pipe and wiring routes, wall and floor condition | Confirms whether the original scope still matches the site |
| Before concealment | Electrical, plumbing, drainage and air-conditioning positions, testing and photographs | Prevents services from being covered in the wrong place |
| Before final wet-area finishes | Waterproofing completion, floor falls, tile layout and penetrations | Wet-area faults become expensive after tiling and fittings |
| During carpentry installation | Alignment, clearances, dimensions, hardware, appliance spaces and service access | Catches fit problems before worktops and final panels close the gaps |
| At handover | Water, drainage, sockets, switches, lights, doors, drawers, sealant, finishes and agreed documents | Creates one traceable defect list and completion record |
Record defects with a location, photograph and agreed rectification date. A vague note such as touch up bedroom is harder to close than Bedroom 2, left wardrobe door rubs against bottom track.
What Disruption Should You Expect?
Hacking, tile removal, drilling and disposal create the most noise and dust. Wet works can restrict bathroom or kitchen use. Painting, adhesives and sealants need ventilation. Deliveries and carpentry installation can temporarily block access routes.
HDB’s current renovation terms state that noisy work is allowed from 9am to 5pm, Monday to Friday, and is not allowed on Saturdays, Sundays, public holidays or the eve of major public holidays. Other renovation work is generally allowed from 9am to 6pm on weekdays and Saturdays, with no renovation work on Sundays and public holidays.
HDB also requires written notice to flats within a radius of two units at least five days before work starts, including work that does not need a renovation permit. Condo owners should follow the working hours, access, protection and neighbour-notice rules in the current MCST pack.
For a full renovation with hacking, wet works and several disconnected services, living in the unit is usually impractical. A focused room renovation may be manageable if the contractor can maintain a safe route, control dust and keep essential water, power and bathroom access available.
Is It Better to Renovate Room by Room or All at Once?
A full-home renovation before moving in is usually easier to coordinate because protection, removal, services, flooring, painting and deliveries can be planned as one programme.
Phased work can help spread spending or keep part of the home usable. It also introduces repeated protection, mobilisation and interface work. Before choosing phases, ask:
- Will later plumbing or wiring cross a completed room?
- Can flooring transitions be finished cleanly?
- Will later hacking damage new carpentry or paint?
- Can the household keep one safe bathroom and access route?
- Are repeated delivery, protection and cleaning costs included?
Use the renovation timeline guide to compare overall programmes, then use this page to plan each room’s dependencies.
How Should You Budget by Room?
Do not assign a room budget from floor area alone. The same-sized kitchen or bathroom can carry very different work.
| Room | Main cost drivers |
|---|---|
| Kitchen | Cabinet and worktop length, appliances, plumbing, electrical work, wall and floor finishes |
| Bathroom | Removal, plumbing, waterproofing, tiling, sanitaryware, screens and ventilation |
| Living and dining | Flooring, ceiling, lighting, feature carpentry, doors and air-conditioning coordination |
| Bedroom or study | Wardrobes, desk carpentry, flooring, lighting, data and air-conditioning |
| Whole home | Hacking, disposal, protection, rewiring, plumbing, painting, doors, approvals and site condition |
For practical planning ranges and current starting scopes, use the budget planning guide and renovation package guide. The final quotation should reflect site measurement, retained items, material choices and confirmed quantities.
Frequently Asked Questions
What is the correct order of renovation works in a Singapore home?
The typical order is planning and approvals, site protection, removal, concealed electrical and plumbing work, wet works, ceilings and floors, carpentry, painting and fittings, testing, defect rectification and handover. The exact sequence can overlap, but hidden services and wet works should be checked before finishes cover them.
Can I stay at home during renovation?
A focused room renovation may be manageable if you retain safe access, essential utilities and a usable bathroom. Living through a full renovation with hacking, dust, wet works and disconnected services is usually impractical. Confirm the daily access and shutdown plan before work starts.
What are the noisiest stages of renovation?
Wall demolition, tile removal, tile cutting and heavy drilling are among the noisiest stages. For HDB flats, these works are restricted to 9am to 5pm from Monday to Friday and must be completed within HDB’s permitted noisy-work window.
How do I know whether concealed work is ready to cover?
Ask the responsible licensed trade to test the work, compare every point with the approved plan and record photographs before walls, ceilings, cabinets or tiles hide it. Do not rely only on a verbal confirmation.
How should bathroom waterproofing be checked?
Confirm the specified waterproofing system, application areas and testing method before tiling. Check attention to corners, penetrations, kerbs and floor traps, then record the completed test and any rectification. The exact method should follow the approved scope and product or professional requirements.
Should I renovate one room at a time?
It can work for a focused improvement or when you need to spread spending. A full-home project is usually more efficient when rooms share new wiring, plumbing, flooring, ceilings or painting. Plan the shared systems first even if the visible work is phased.
What should I check before accepting handover?
Test taps, showers, toilets, drainage, sockets, switches, lights, appliances, doors, drawers and locks. Check tile edges, sealant, paint, carpentry alignment and every item in the quotation. Record defects with photographs, locations and agreed rectification dates.
Turn the Room List Into One Coordinated Scope
Bring your floor plan, photographs, must-have rooms, retained items, appliance list and target move-in date to the first consultation. Home Reno can map the room work into one itemised sequence, identify approvals and licensed trades, and separate essential work from optional upgrades.
Start with the closest renovation package path or request an itemised quotation for the home you actually have.